Why Pavers Shift, Sink, or Grow Weeds (Prevention Guide)
What causes paver problems — base prep failures, missing edge restraints, polymeric sand neglect — and how to spot them early.
Our team at Ridgeline Outdoor Living was founded on a simple mission to provide landscaping and hardscaping services you can genuinely rely on. You know how frustrating it is to invest in a sustainable yard only to watch a costly patio fail after just one wet season. That early sinking is rarely a random accident.
We trace almost every hardscape failure straight back to four specific installation shortcuts. Knowing these common failure modes helps you understand exactly why do pavers shift before the final sand goes down.
Let’s look at the data behind these issues and explore exactly how to prevent them.
1. Insufficient sub-base depth or compaction
Insufficient sub-base depth causes pavers to sink because the ground underneath cannot support the weight above it. The single biggest reason why do pavers shift is a weak foundation.
Our crews strictly follow the Interlocking Concrete Pavement Institute (ICPI) guidelines for excavation. Pedestrian patios require a compacted aggregate base of 4 to 6 inches. Driveways need at least 6 to 8 inches of gravel to handle vehicle loads. We install this base in 2-inch lifts, using a mechanical plate compactor between every single layer.
The Cost of Cutting Corners
Many cheap installations lay one thick layer of gravel to save time. This skipped compaction leads to uneven settling within the first 12 to 24 months. We often see homeowners forced to pay between $7 and $30 per square foot in California just to repair sunken sections.
Signs of a failing base include:
- Pavers sinking unevenly across the surface.
- Ponding water at low spots after rain.
- A visible rolling or wavy appearance to the patio.
- Tripping hazards where edges lift up.
2. Missing or undersized edge restraints
Pavers migrate outward over time without a strong physical barrier holding the perimeter in place. A missing edge restraint is the second most common reason for shifted stones.
We always secure the borders with heavy-duty products like SEK-Surebond Snap Edge. This 100% recycled high-density polyethylene edging stops lateral movement completely. Installers must drive steel stakes 8 to 10 inches deep into the compacted base. Our installers place these stakes every 12 to 16 inches along straight edges for maximum stability.
Preventing Edge Spreading
Skipping this perimeter support looks fine on day one. By year two, the field will spread and open large gaps in the joints. We constantly fix patios where shallow stakes have lifted out of the ground due to soil movement.
This failure is sometimes called a tip-out. The entire outer row of pavers eventually slides into the surrounding soil.
Signs of edge failure include:
- Visible gaps along the patio perimeter.
- Pavers sliding outward into the garden beds.
- Exposed sand beds washing away over time.
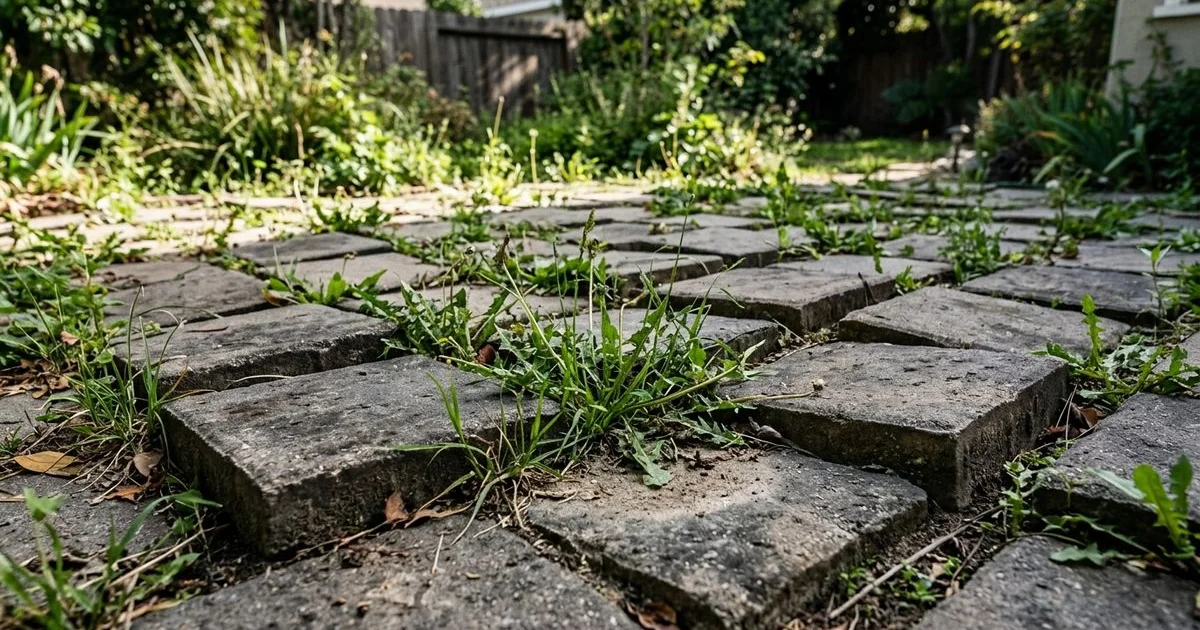
3. Polymeric sand washed out (or never installed)
Jointing sand erosion allows water to penetrate the base and gives opportunistic weeds a place to grow. If your installer used plain mason sand, it will wash out within a single rainy season.
We exclusively use high-quality polymeric sand to lock hardscapes together. This specialized mixture contains chemical binders that solidify when exposed to water. A proper application blocks 95% of weed germination compared to traditional loose sand. Our process allows the joints to cure undisturbed for 24 to 48 hours.
Protecting Your Joints Long-Term
Polymeric sand typically lasts 3 to 5 years under normal conditions. Improper installation drastically reduces this lifespan. We find that using too much water during the initial wetting process weakens the polymer bonds.
Heavy pressure washing also blasts away the protective surface. Once the sand degrades, California’s drought-resistant weeds will quickly take hold between the stones.
Signs of joint failure include:
- Aggressive weeds between pavers starting to sprout.
- Visible sand erosion along the joint lines.
- Loose pavers that rock or click when stepped on.
- Ants excavating tiny tunnels through the gaps.
4. Tree roots and hidden softscape
Buried organic matter and aggressive tree roots will push pavers up from below. You cannot prevent this type of failure from the surface.
Our site evaluations prioritize locating existing root systems before excavation begins. Many drought-tolerant California trees have shallow root systems seeking moisture. These roots easily penetrate loose soil and heave the stones upward over time. We recommend removing old stumps and clearing all organic debris from the area completely.
Managing Soil Stability
Laying a patio over compacted native soil without an engineered sub-base is a recipe for disaster. Organic matter decomposes and creates hidden voids underneath the surface. We use a heavy geotextile fabric layer to separate the native soil from the new gravel base.
This barrier stops the ground from swallowing the aggregate. It also acts as a secondary defense against weed seeds trapped below.
Signs of softscape issues include:
- Localized heaving near large trees or shrubs.
- Uneven sinking patterns that do not align with foot traffic.
- Sudden bumps forming after a period of heavy rain.
How a properly built paver patio prevents all four
The ICPI installation standard exists specifically to eliminate these exact structural failures. A professional build requires careful excavation and multiple layers of defense.
We strictly follow a proven checklist for every single project. Most budget contractors skip at least three of these critical steps to offer a lower price. Cutting corners leads directly to early shifting and sinking. Our comprehensive approach guarantees a stable foundation for decades.
| Installation Step | Cheap Install Method | The ICPI Standard Method |
|---|---|---|
| Base Excavation | Minimal digging, often leaving old soil. | 4 to 6 inches for patios, deeper for cars. |
| Aggregate Base | One thick layer dumped at once. | Installed and compacted in 2-inch lifts. |
| Soil Separation | Skipped entirely to save money. | Geotextile fabric placed over native soil. |
| Edge Restraints | Flimsy plastic or completely missing. | Heavy-duty restraints at every perimeter. |
| Joint Material | Plain mason sand that washes away. | Polymeric sand activated with water. |
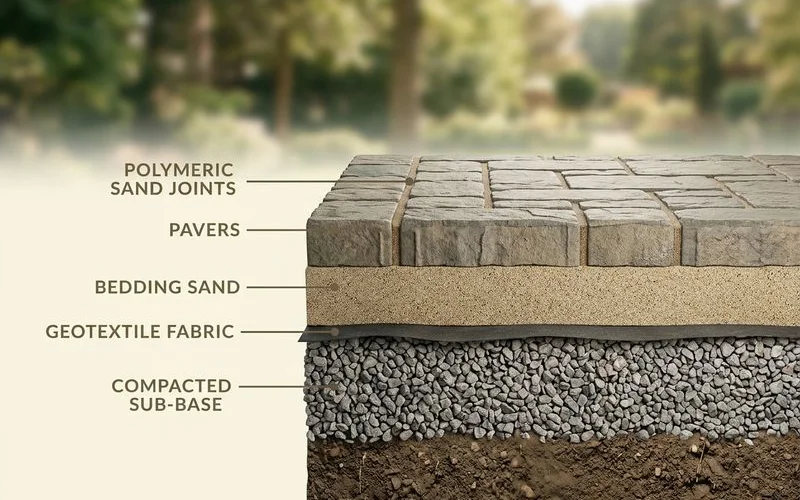
Every Ridgeline project includes a 1-inch bedding sand layer placed perfectly over the compacted base. Installers lay the pavers to pattern and then plate-compact them directly into the bedding sand.
If you are still mapping out your project, our guide on best Pavers for the Los Angeles Climate covers a related angle that pairs well with this topic.
Catching a marginal install early
You can often spot signs of failure within the first 6 to 12 months. Catching these issues early keeps repair costs low and prevents total base failure.
We highly recommend inspecting your patio closely after the first major rainstorm. Look for edge spreading along the borders. Check for sand washing out from the joints. Our maintenance crews can usually fix localized settling before it spreads to the whole yard.
If you wait too long, the base will likely need a complete and expensive rebuild. For installation discipline that holds for decades, see our paver patio service.
Frequently Asked Questions
Why are my pavers sinking?
Why do weeds grow between my pavers?
Can shifted pavers be fixed?
Have questions about a project of your own?
A free on-site consultation, a phased budget tier, and a master plan that fits your property and your goals.